
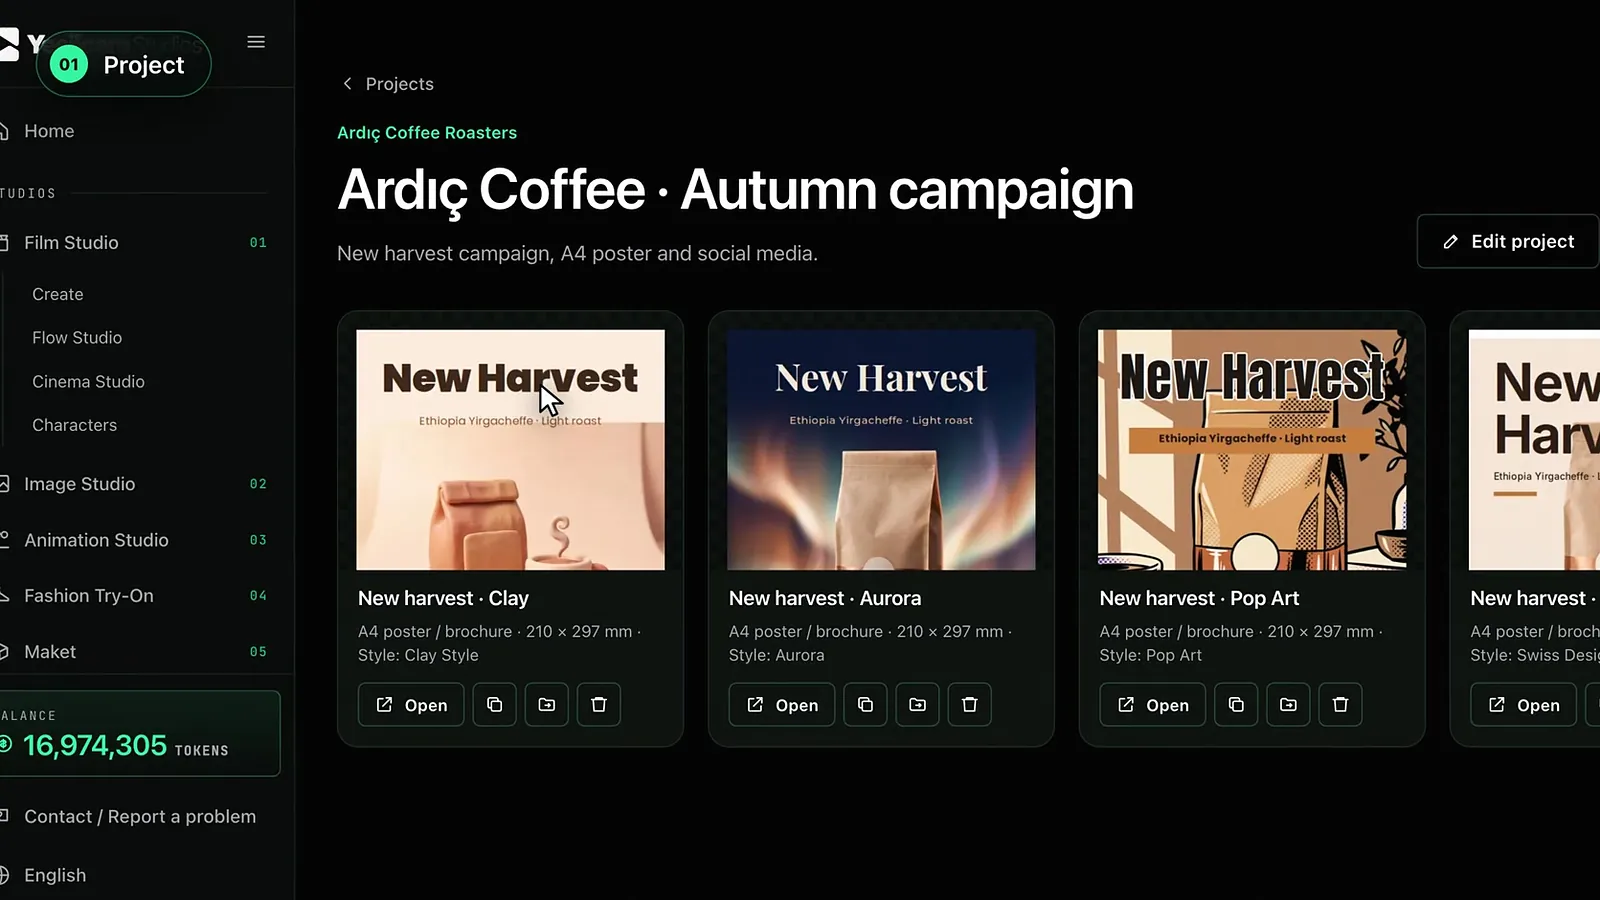
A client-based design workflow is a setup that keeps each client's work in its own folder and takes every job through the same steps: brief, concept, revision, approval, delivery. For agencies and freelance designers, the biggest time sink is not the design itself but the mess around it: which version was approved, which file went to the printer, where the current logo lives. This article defines these steps, describes what each one produces and the common mistakes, and in the last section shows how to set up the same flow in Design Studio at Yeşilçam Studios.
What are the components of a client-based workflow?
- Client folder. All of a client's jobs, brand assets and notes in one place. When a new job comes in, the first step is to open this folder.
- Brand assets. The logo (ideally vector), the RGB and CMYK values of the brand colours, the typefaces in use, product photos. These should not have to be requested again for every job.
- Brief. A short document stating the purpose of the job, the audience, the texts to use, the sizes and the due date.
- Version and approval record. Which version went to the client, what feedback came back and when the final version was approved.
- Delivery package. The approved design in the right format for every place it will be used: PDF/X for the printer, RGB images for the web, vector for the sign maker.
What goes into a good design brief?
The clearer the brief, the fewer the revision rounds. A good brief answers these questions:
- Purpose. What should this design make people do? Come to an opening, try a product, read a menu, attend an event.
- Audience and tone. Who is it for, warm or formal, plain or bold?
- Word-for-word texts. Headline, subheading, call to action, date and address. Making up copy during design is the most common cause of revisions.
- Size and placement. An A4 poster, a business card, an Instagram post? If it is print, the paper and the printer.
- What to avoid. Competitor colours, images that must not be used, approaches the client has rejected before.
- Due date and approver. Who has the final say, and by when?
How does the process run from concept to delivery?
- Take the brief and add it to the folder. If brand assets are missing, ask for them before you start.
- Prepare two or three concepts. In different styles, with the same texts. Offering options reduces "I don't like it but I don't know what I want" feedback.
- Have the client pick one concept. Do not delete the others; they become references for later jobs.
- Run the revision rounds. Collect the feedback for each round in a single list and apply it all together. Setting the number of rounds in the contract is common practice.
- Check before print. Spelling, bleed, safe area, resolution, colour profile and legibility.
- Get final approval in writing. Email the file or a preview of the approved version and keep a record of the approval.
- Export the delivery package. A separate format for each use: PDF/X for the printer, RGB for social media, vector for signage.
- Archive it. The approved design is the starting point for similar jobs in the future.
How do you manage the revision and approval cycle?
Most revisions come from three sources: copy that was not in the brief, more than one decision-maker on the client side, and feedback that arrives piece by piece. You solve the first two at the brief stage. For the third, the rule is simple: do not apply feedback piecemeal. Ask the client to collect it in one list, apply it all in the same round and send the new version.
Keep the previous version in every round. When the client says "the first one was better", being able to go back is far faster than rebuilding the design. Duplicating the design and working on the copy is the simplest way to do this.
A naming convention for versions saves time as well. Putting the client, the job and the version in the design name (e.g. "Coffee Stop poster v2") makes it unambiguous which file you are talking about when you write to the client. Adding "approved" to the name of the approved version prevents the wrong file from being sent on delivery day.
Final approval should be given for the file that actually goes to print. There can be colour differences between a JPG approved on screen and the CMYK PDF sent to the printer; for critical jobs, share the print preview with the client too. File preparation is covered in detail in the print-ready PDF/X article.
What are the most common mistakes?
- Keeping every client's files in one folder. The wrong client's logo ends up in the wrong job.
- Asking for the copy after the design is done. A long text breaks a settled layout from scratch.
- Sending to print on verbal approval. When something goes wrong, nobody knows who approved what.
- Delivering in a single format. Sending a PNG to the printer or a CMYK PDF to social media causes problems on both sides.
- Overwriting the old version. There is no way back.
How do you set up a client-based workflow at Yeşilçam Studios?
In Design Studio, everything starts with a project. A project is like a folder for one client or job: next to the project name you can enter the client's name and a note (brand colours, contact person, due date). Posters, business cards, brochures and social media visuals sit together in the same project.
- Open a project. Use "New project" to enter the project name, the client and the note.
- Pick the canvas. Print sizes from A6 to A0, business card, postcard, DL flyer, brochure, invitation, menu, posters, roll-up, sticker and banner; digital sizes such as Instagram, Story, YouTube, LinkedIn, X and Pinterest; or a custom size.
- Give the brief. A description, the brand name, texts (headline, subheading, body, call to action, info) and images. Texts are used word for word and become editable layers. Add your logo with the "Logo" role and your product photos with the "Image" role; you can give each image an optional instruction. In the "Avoid" field, list what you do not want to see in the result.
- Produce the concepts. Create designs in different styles from the same brief; choose from 21 design styles, or pick "Free" to let Sam choose the style. Trying first in Draft quality and then upgrading the chosen concept to 4K with the same composition keeps costs down.
- Apply the revisions. Change text, colours and layers yourself in the editor, or write the feedback as a single instruction in "Improve with Sam"; Sam reworks the design while keeping the layers you want. To keep the previous version, duplicate the design first with "Copy".
- Deliver. Export CMYK PDF/X for the printer, PNG, JPG or WEBP for digital, and SVG or EPS for signage and cutting.
You can move a design into another client's project with "Move", use it in other studios with "Save to library", or prepare an animated version with "Turn into animation". For integrating product photos into the scene, removing their background or using them as framed photos, see the images, products and logos guide; for your first project, see the getting started with Design Studio guide.
The cost is visible for each design: before you create it, the summary lines and the total in tokens are shown. List prices (Basic) are 11,376 tokens for a draft design (about $0.07), 44,042 tokens for a Print 4K image (about $0.26), 71,167 tokens for a Premium 4K image (about $0.43) and 1,021 tokens for a CMYK or vector export. Sam's layout share is an estimate; only actual usage is charged and the rest is refunded. Failed jobs are refunded automatically. A ×0.8 multiplier applies on the Pro plan and ×1.3 on the free plan. These figures apply as of October 2026, and current prices are on the pricing page; the differences between plans are in the tokens and plans guide.
Frequently asked
How many revision rounds are reasonable? Common practice is to set two or three rounds in the contract and price anything beyond that separately. A clear brief and consolidated feedback finish most jobs within that limit.
What format should I send the client as a concept? Since it will be viewed on screen, an RGB PNG or JPG is enough. For print jobs, sharing the print preview at the final approval stage avoids colour surprises.
Does Design Studio have client access or a share link? No. Projects stay in your account; you export the concepts and final files and send them to your client through your own channels.
Can I reuse one client's design for another job? Yes. You can copy the design within the same project or move it to another project. With its size and texts changed, the copy becomes the starting point for a new job.
Can I have more than one design prepared at once? Yes, up to two designs can be prepared at the same time. You can leave the page while they are prepared; the design will be ready in the project.