
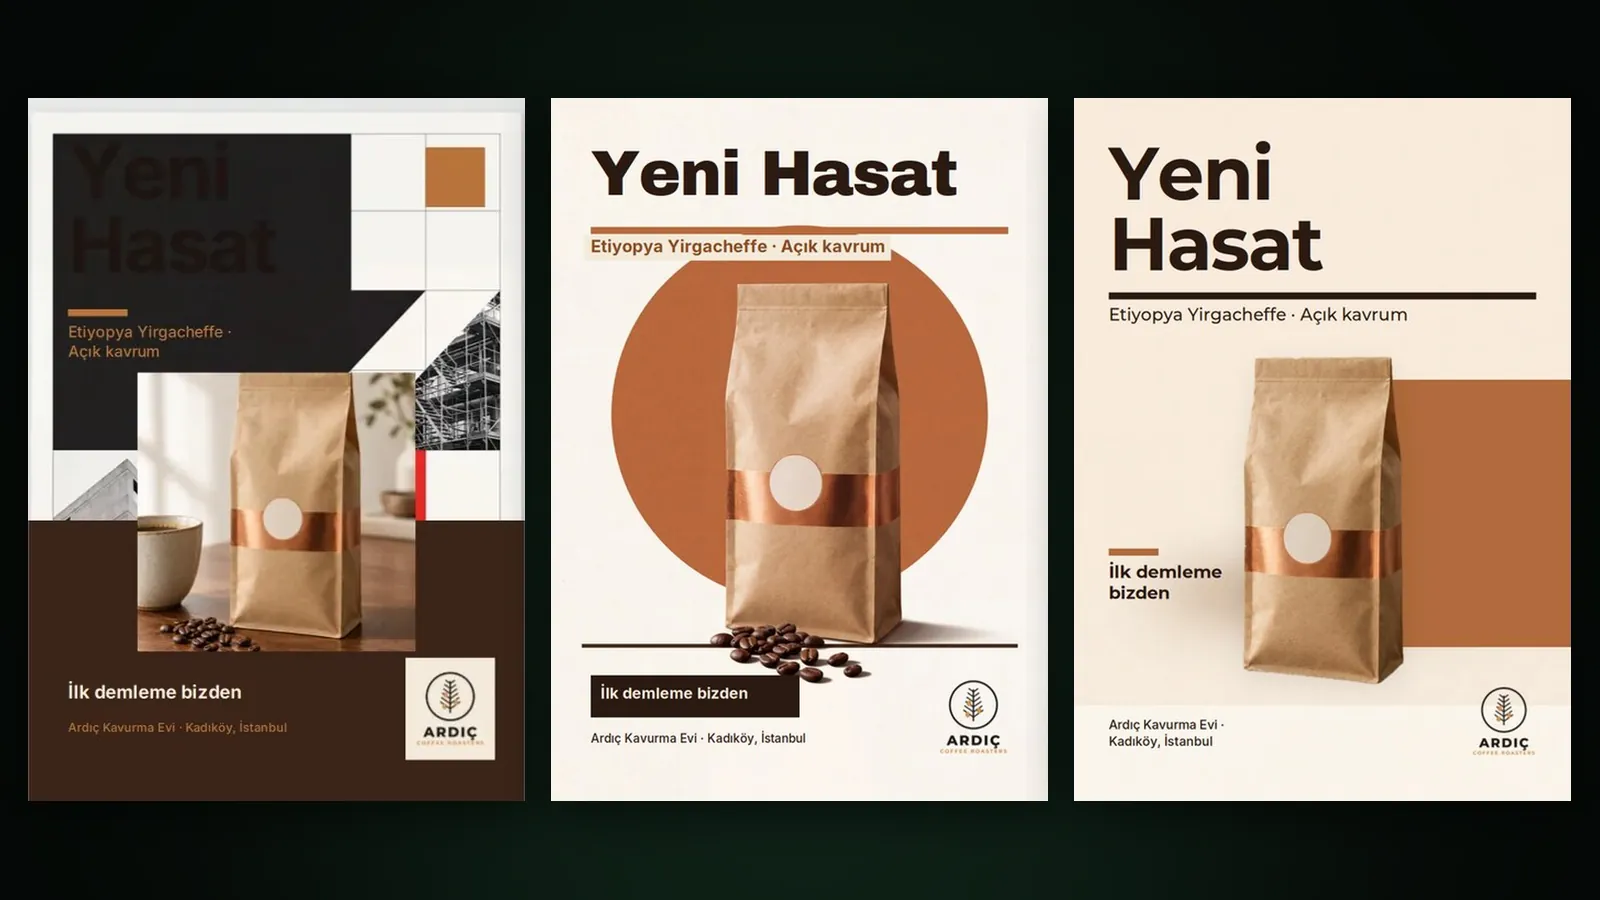
To add a logo, a product photo or any other image to a design in Design Studio, press Add images in the Images section of the new design form, pick the file from your computer or your library, and set its role and an optional instruction. For product photos you also choose how the product is used: integrate it into the scene, remove the background, or use it as a photo.
This guide covers the ways to add images, per-image instructions, the three product treatments and what they cost, as of October 2026.
Which images can you add?
You can add JPG, PNG and WEBP files up to 15 MB. Drag images onto the window, or choose From computer or From your library. The Use in Design Studio button on an image card in Image Studio also takes you to the new design form with that image in place; for Image Studio itself, see the Image Studio guide.
Image role: image or logo?
Every file you add has a role: Image or Logo. A file with the Logo role is treated as your brand mark and is not redrawn; it is placed in the design as a separate layer. A file with the Image role can be a product, a photo of a place or a background; the product treatment options appear only for the Image role.
You can add several images to one design, for example a logo, a product photo and a photo of a venue for the background. Because each image keeps its own role and instruction, Sam does not have to guess from a long description which one is the brand mark, which is the product and which is the background. If you added the wrong image, take it off the list with Remove.
An instruction for each image
Each image has an optional instruction box under it. Write where and how that image should be used. Common instructions can be added with one click:
- Logo bottom right, small. The logo sits in the corner without distracting.
- Product centred, with shadow. The product becomes the focus of the composition.
- As a blurred background. The image spreads across the background and makes room for text.
- Redraw it in the style. The image is reinterpreted in the language of the chosen design style.
How should the product be used? Three options
| Option | What happens | When to use it |
|---|---|---|
| Integrate into the scene (default) | Sam redraws the product inside the scene in the chosen style; its shape, colour, label and logo are kept and checked. | When the product should truly belong to the scene’s light and style |
| Remove background, use as is | Your own product photo is placed with its background removed and a soft shadow that matches the scene light. | When the product photo must stay pixel for pixel the same |
| Use as a photo (framed) | The photo is placed as it is, as a framed picture. | For documentary shots such as a venue, a team or an event |
With Integrate into the scene, the drawn product goes through a fidelity check: its shape, colour and label are compared with the source, and a product that looks pasted on is caught. If the check fails, the product is redrawn once with a correction. That is why the summary shows two extra lines: Product fidelity check (estimate) and Possible redraw share (refunded if unused).
How is the cost calculated?
Adding images and writing instructions costs nothing extra; the Sam layout and the image quality you choose are charged. If a product is integrated into the scene, the estimated cost of the fidelity check and the redraw share are added. The redraw share is 20% of the image price and is reserved up front; it is refunded if no redraw is needed, and if a redraw is needed you are not charged the difference. For a Print 4K image on the Basic plan, for example, the share is about 8,800 tokens (about $0.05). These two lines do not appear for the remove-background and photo options. List prices are for Basic; Free ×1.3, Pro ×0.8. Current prices are on the pricing page.
Step by step: integrating a product into the scene
- At /app/design, open your project and press New design.
- Choose the canvas and the style.
- In the Images section, add your product photo; leave its role as Image.
- Under How should the product be used?, choose Integrate into the scene.
- Write the placement in the instruction box, e.g. “Product centred, with shadow”.
- Add your logo, set its role to Logo and, if needed, give it the instruction “Logo bottom right, small”.
- Enter your texts, choose the quality, check the summary and press Design with Sam.
The sharper the product photo and the plainer its background, the more faithful the result. The product’s label or logo should be legible in the photo.
Changing things later
When you select an image layer in the editor, settings open for fit (Show all or Fill the box), shadow, blur, corner radius and horizontal flip; Replace swaps the image for another one. If you tick Also regenerate the image layer in the Improve with Sam window, the check and the redraw share for an integrated product are added again. For the editor’s other tools, see the editor and legibility guide.
Tips
- One focus. One main product per design gives a legible, balanced result.
- Logo file. A PNG logo with a transparent background sits in the design most cleanly.
- Keep instructions short. Position and size, such as “bottom left, small”, are enough.
- Pick the right treatment. If the photo must stay identical, use the remove-background option. Our post on the topic: placing a product photo into the scene.
Frequently asked
Is my logo redrawn? No. Files with the Logo role are placed as they are, as a separate layer.
Does the product change when it is integrated into the scene? Sam redraws the product but works to keep its shape, colour, label and logo; the result is checked and, if needed, redrawn once with a correction.
Do I always pay the redraw share? No. The share is reserved up front and refunded to your balance if no redraw is needed.
Does the remove-background option cost extra? It is not charged as a separate line; the normal cost of the design applies.
Which file types can I upload? JPG, PNG and WEBP, up to 15 MB.